Whitfield Pellet Stove Manual: A Comprehensive Guide
Welcome! This manual details operation, maintenance, and troubleshooting for your Whitfield pellet stove, ensuring safe and efficient heating within your home environment․

Whitfield pellet stoves represent a commitment to efficient, reliable, and environmentally conscious home heating․ These stoves utilize compressed wood or biomass pellets as fuel, offering a sustainable alternative to traditional heating methods․
Whitfield has established a reputation for quality craftsmanship and innovative design, providing homeowners with a comfortable and cost-effective heating solution․ This manual serves as a comprehensive resource, guiding you through every aspect of owning and operating your Whitfield pellet stove – from initial setup and safe operation to routine maintenance and troubleshooting․
Understanding your stove’s features and following the guidelines within will maximize performance and ensure years of dependable service․ We are delighted you chose Whitfield!

Understanding Your Whitfield Pellet Stove Model
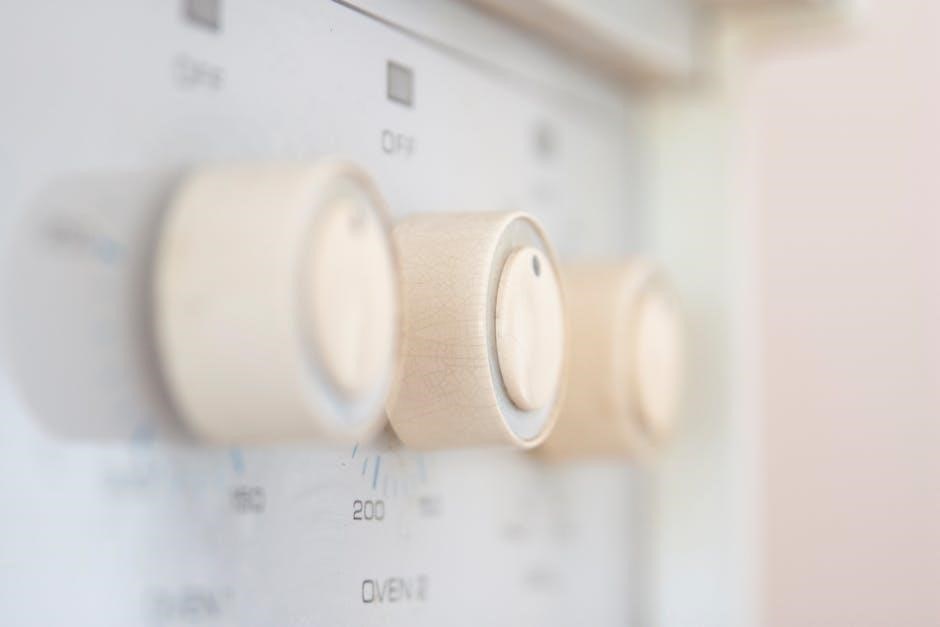
Each Whitfield pellet stove model possesses unique characteristics and features designed for optimal performance․ Before operation, familiarize yourself with the specific components of your stove․
Locate the model number and serial number – typically found on a label affixed to the back or side of the unit – and refer to the accompanying diagrams in this manual․ Understand the function of key parts like the hopper, burn pot, exhaust vent, control board, and remote control (if applicable)․
Knowing these elements will aid in proper operation, maintenance, and troubleshooting․ Whitfield strives for excellence in academics, athletics, and the arts, mirroring the stove’s multifaceted functionality;
Safety Precautions and Warnings
Prioritize safety! Whitfield pellet stoves generate significant heat; improper use can lead to fire, burns, or carbon monoxide poisoning․
Always maintain a clear space around the stove, free from combustible materials․ Never store flammable liquids nearby․ Ensure proper ventilation and install carbon monoxide detectors․ Regularly inspect the venting system for obstructions․
Do not overfill the hopper or operate the stove with damaged components․ Keep children and pets supervised around the stove․ Like a balanced education at Whitfield School, safe operation requires diligence and awareness․ Refer to all warning labels and follow instructions meticulously․
Installation Guide
Professional installation is recommended! This ensures compliance with local codes and safe operation․
Carefully unpack the stove and inspect for damage․ Select a stable, level surface capable of supporting the stove’s weight․ Maintain required clearances from combustible materials – consult the detailed diagrams․ Proper venting is crucial; use only approved venting components, ensuring a secure and sealed connection․
Electrical connection requires a dedicated circuit․ Like preparing students for college, a solid foundation is key․ Follow all electrical codes․ Double-check all connections before initial startup․
Preparing the Installation Area
Site selection is paramount! Choose a location meeting all safety clearances – typically 36 inches from combustible walls․ The floor must be non-combustible, protected by a hearth pad extending beyond the stove’s dimensions․
Ensure adequate space for loading pellets and servicing the unit․ Verify the structural integrity of the floor to support the stove’s considerable weight․ Like Whitfield’s commitment to a balanced life, preparation is essential․ Clear the area of all obstructions and debris․ Confirm access to a suitable electrical outlet and venting pathway․
Venting Requirements
Proper venting is critical for safe operation! Whitfield pellet stoves require a dedicated, listed venting system designed for pellet appliances․ Use only approved components – stainless steel is highly recommended․
Maintain specified vent pipe diameters and lengths as outlined in the installation instructions; deviations can compromise performance․ Ensure a proper draft and avoid sharp bends․ Like a Whitfield education preparing students for the future, correct venting ensures optimal stove function․ Regularly inspect the vent for obstructions or damage, ensuring clear exhaust pathways․
Electrical Connection
Caution: Electrical work should be performed by a qualified technician! Your Whitfield pellet stove requires a dedicated 120V, 15-amp circuit․ Never share this circuit with other appliances․
Ensure the outlet is properly grounded, adhering to local electrical codes․ A surge protector is recommended to safeguard the control board, much like Whitfield’s commitment to student wellbeing․ Verify the voltage matches the stove’s specifications․ Improper electrical connection can cause malfunctions or pose a fire hazard․ Always disconnect power before servicing any electrical components․
Operating Instructions
Before first use, carefully review all safety precautions․ Whitfield stoves prioritize user experience, mirroring their educational approach․ Begin by ensuring the pellet fuel is loaded correctly – see section 4․2․ Initiate the startup sequence via the control panel, following the on-screen prompts․
Monitor the initial ignition phase․ Adjust flame intensity using the control settings to achieve desired heat output․ Regularly check the burn pot for optimal combustion․ Familiarize yourself with the stove’s operational sounds; any unusual noises warrant investigation․

Initial Startup Procedure
Prior to the first ignition, verify the pellet stove is correctly installed and vented, adhering to all safety guidelines․ Ensure the fuel hopper is filled with approved pellet fuel․ Power on the stove using the main switch․ The control board will initiate a self-diagnostic check․
Follow the on-screen prompts to begin the startup sequence․ The auger will deliver fuel to the burn pot, and the igniter will activate․ Allow sufficient time for the pellets to ignite and establish a stable flame․ Monitor closely during this phase, and adjust settings as needed․
Loading Pellet Fuel
Always use dry, approved pellet fuel to ensure optimal stove performance and minimize ash buildup․ Carefully lift the hopper lid and slowly pour the pellets into the hopper, avoiding overfilling․ Do not introduce foreign objects or debris into the hopper․
Regularly check the fuel level, especially during extended cold periods․ Maintaining a sufficient fuel supply prevents interruptions in heating․ Avoid using pellets that are damaged, dusty, or contain excessive moisture․ Proper fuel storage is crucial for consistent operation․
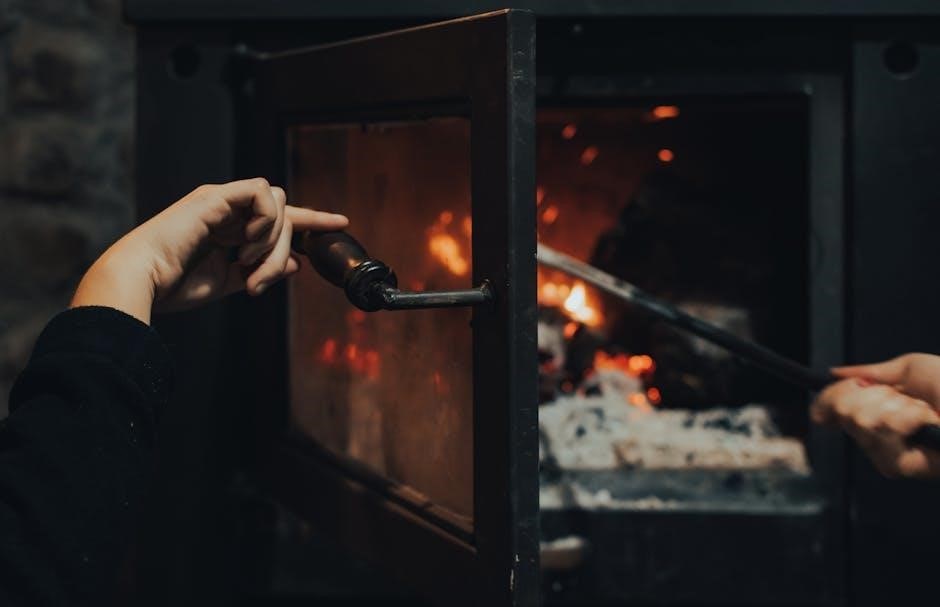
Ignition and Flame Control
Upon startup, the Whitfield stove utilizes an automatic ignition system․ Observe the flame through the viewing glass; it should be bright and consistent․ The control board manages fuel feed to maintain the desired heat output․
Adjust the heat settings using the control panel or remote control․ Experiment to find comfortable temperature levels․ A healthy flame indicates proper combustion․ If the flame is weak or flickering, consult the troubleshooting section․ Never attempt to manually adjust the flame; rely on the stove’s automated controls․
Maintenance and Cleaning
Regular maintenance is crucial for optimal performance and longevity of your Whitfield pellet stove․ Consistent cleaning prevents buildup and ensures efficient heating․ Daily checks include emptying the ash pan and inspecting the viewing glass for soot․
Weekly procedures involve cleaning the burn pot and removing any accumulated debris․ Annual servicing by a qualified technician is recommended, including a thorough inspection of all components and the venting system․ Prioritize safety – always disconnect power before cleaning!
Daily Maintenance Checks
Essential daily tasks maintain your Whitfield pellet stove’s efficiency․ First, empty the ash pan – allow ashes to cool completely before disposal in a metal container․ Next, inspect the viewing glass; wipe away soot buildup with a damp cloth (when cool) for clear visibility․
Check the pellet level in the hopper and replenish as needed․ Finally, listen for unusual noises during operation, which could indicate a potential issue requiring attention․ These simple checks ensure safe and reliable performance․
Weekly Cleaning Procedures
Comprehensive weekly cleaning optimizes your Whitfield pellet stove’s performance․ Begin by vacuuming the firebox, removing any accumulated ash or debris – ensure the stove is completely cool․ Inspect the venting system for obstructions; a blocked vent reduces efficiency and poses a safety hazard․
Clean the heat exchanger with a brush, removing soot buildup․ Check and clean the air intake vents to ensure proper airflow․ Finally, wipe down the exterior surfaces with a damp cloth․ Regular cleaning extends the stove’s lifespan․
Annual Servicing
Professional annual servicing is crucial for maintaining your Whitfield pellet stove’s safety and efficiency․ A qualified technician should inspect the entire system, including the venting, combustion chamber, and control board․
Check and calibrate the thermostat for accurate temperature regulation․ Inspect and clean the blower motor, ensuring optimal airflow․ Examine the door gaskets for wear and tear, replacing them if necessary․ This preventative maintenance extends the stove’s lifespan and ensures safe, reliable operation throughout the heating season․
Troubleshooting Common Issues
Addressing issues promptly ensures optimal performance․ If your Whitfield stove fails to ignite, check the pellet level, power supply, and igniter․ Poor heat output often indicates insufficient pellet fuel, blocked venting, or a malfunctioning blower․
Consult the error code list in this manual; each code pinpoints a specific problem․ Never attempt repairs beyond your expertise – contact a qualified technician․ Regular maintenance, as outlined previously, minimizes these common issues and extends your stove’s operational life․
Stove Not Igniting
If ignition fails, first verify the pellet hopper contains sufficient fuel and the auger is functioning correctly․ Check the power supply to ensure the stove receives adequate electricity․ Inspect the igniter for damage or debris; a faulty igniter prevents combustion․
Confirm proper venting as blockages hinder airflow․ Review error codes displayed on the control panel for specific diagnostics․ If issues persist, reset the stove following the instructions․ Contact qualified service personnel if these steps don’t resolve the problem․
Poor Heat Output
Reduced heating performance often stems from insufficient pellet fuel; ensure the hopper remains adequately filled․ Verify proper airflow – blocked vents restrict heat distribution․ Check for ash buildup within the firepot, hindering efficient combustion․
Inspect the door gasket for leaks, allowing heat to escape․ Confirm correct fan speed settings on the control board․ Utilize high-quality pellet fuel for optimal BTU output․ If problems continue, consult a technician to assess the blower motor and heat exchanger․
Error Codes and Their Meanings
Error codes indicate specific issues within your Whitfield stove․ Code E1 signals a low hopper level – refill immediately․ E2 suggests an auger jam; power cycle the stove․ E3 indicates a failed ignition attempt, check fuel quality and blower․
E4 signifies an overheat condition, allowing the stove to cool․ E5 points to a draft issue, inspect venting․ E6 indicates a sensor malfunction, requiring professional service․ Refer to the full code list in the appendix for detailed troubleshooting steps and contact support if unresolved․
Parts List and Diagrams
This section provides a comprehensive inventory of your Whitfield pellet stove’s components․ Included are detailed diagrams illustrating the placement of each part, aiding in maintenance and repair․ Key components listed encompass the hopper, auger, blower motor, control board, igniter, and various sensors․
Part numbers are clearly indicated for easy ordering of replacements․ Always use genuine Whitfield parts to ensure compatibility and performance․ Diagrams showcase exploded views, simplifying assembly and disassembly․ Refer to this list before contacting customer support for assistance․
Warranty Information
Your Whitfield pellet stove is protected by a limited warranty against manufacturing defects․ The standard warranty covers parts and labor for a period of one year from the date of purchase․ Extended warranty options may be available; inquire at the point of sale․
Warranty coverage is contingent upon proper installation and adherence to operating instructions․ Damage resulting from misuse, neglect, or unauthorized modifications is not covered․ Retain your proof of purchase for warranty claims․ Contact Whitfield customer support to initiate a warranty request․
Whitfield Stove Customer Support
For assistance with your Whitfield pellet stove, our dedicated customer support team is readily available․ We offer support via phone, email, and an extensive online resource center․ Our knowledgeable representatives can assist with troubleshooting, parts inquiries, and warranty claims․
Visit our website for frequently asked questions, downloadable manuals, and helpful videos․ Contact information is readily available on our website and within this manual․ We are committed to ensuring your complete satisfaction with your Whitfield stove․ Prompt and efficient service is our priority․
Pellet Fuel Quality and Types
Optimal performance of your Whitfield stove relies on high-quality pellet fuel․ Premium grade pellets, with low moisture content (under 20%) and ash content, are recommended․ Wood pellets, typically made from compressed sawdust, are the most common type․
Other options include agricultural pellets (straw, corn) but may require adjustments․ Avoid pellets with excessive dust or binders․ Proper storage is crucial; keep pellets dry and protected from the elements․ Using inferior fuel can lead to reduced efficiency and increased maintenance․

Advanced Features and Settings
Whitfield stoves offer customizable settings for optimized performance․ Adjustable feed rates control fuel consumption and heat output․ The air intake damper regulates combustion efficiency․ Explore the thermostat settings for precise temperature control and scheduling․
Advanced users can fine-tune parameters like burn time and exhaust temperature․ Refer to the control board section for detailed explanations of each setting․ Experiment cautiously, noting changes and their effects․ Proper configuration maximizes efficiency and ensures a comfortable heating experience․
Remote Control Operation
Your Whitfield stove may include a remote control for convenient operation; Power on/off the stove from a distance, adjusting temperature settings with ease․ The remote allows for precise control of fan speed and fuel feed rate․
Utilize the programmable features to set schedules and automate heating․ Ensure clear line of sight between remote and stove for optimal performance․ Replace batteries regularly to maintain functionality․ Refer to the remote control’s separate manual for specific button functions and troubleshooting tips․
Understanding the Whitfield Control Board
The Whitfield control board is the central nervous system of your stove, managing all functions․ It monitors temperature sensors, controls the auger and fan, and displays error codes․ Key components include the main processor, relay switches, and communication ports․
Understanding the board’s layout aids in troubleshooting․ Never attempt repairs yourself; contact a qualified technician․ The board regulates fuel delivery based on set temperature and demand․ Proper grounding is crucial for safe operation․ Refer to the wiring diagram for component locations and connections․
Optimizing Stove Performance
To maximize efficiency, ensure proper pellet fuel quality and consistent loading․ Regular cleaning of the burn pot and heat exchanger is vital for optimal heat transfer․ Adjusting the air intake controls burn rate and flame quality; experiment for best results․
Monitor flue pipe temperature to prevent overfeeding or underfeeding․ Utilize the control board’s settings to fine-tune operation to your home’s insulation and climate․ Avoid using wet or dusty pellets, as they reduce efficiency and increase creosote buildup․ Consistent maintenance ensures peak performance․

Frequently Asked Questions (FAQ)

Q: Why won’t my stove ignite? A: Check pellet levels, power supply, and ensure the auger is clear․ Q: What causes white smoke? A: Often indicates insufficient air; adjust intake․
Q: How often should I clean the stove? A: Daily ash removal, weekly burn pot cleaning, and annual professional servicing are recommended․ Q: Can I use any type of pellet fuel? A: Use high-quality, dry wood pellets for optimal performance․ Q: What do error codes mean? A: Consult the troubleshooting section for code definitions․
Whitfield Stove Accessories
Enhance your Whitfield stove experience! Available accessories include a pellet vacuum for easy cleanup, a glass cleaning kit to maintain visibility, and upgraded venting components for improved efficiency․
Consider a hearth pad for floor protection and a remote control for convenient operation․ We also offer replacement parts like burn pots and motors․ Protective gloves and safety glasses are recommended during maintenance․ Explore our website or contact a dealer for a complete catalog and pricing․ Properly installed accessories maximize performance and longevity of your Whitfield pellet stove․

Resources and Further Information
Need additional support? Visit the official Whitfield Stove website for frequently asked questions, downloadable manuals, and troubleshooting guides․
Explore online forums dedicated to pellet stove owners for community advice and shared experiences․ Contact authorized Whitfield dealers for local service, parts, and expert installation assistance․ Review safety guidelines from the Pellet Fuels Institute (PFI) for best practices․ Remember to register your stove for warranty updates and important safety notifications․ Prioritize safe operation and consult professionals when needed․